I
CAN`T SEE THE FOREST FOR THE TREES: BRADDOCKS
DEFEAT AT MONOGAHELA
 48th Regiment ready for the woods? (britishbattles.org)
 48th Grenadier front and centre.(britishbattles.org)
While the Treaty
of Aix-La-Chappelle of 1748 officially ended the War of Austrian Succession,
(known as King George’s War in North America )
it was more or less a truce between France Great Britain New France saw the borders of
their colony reach from the Bay of Fundy in
Atlantic Canada to the Gulf of Mexico via the Mississippi River . This hemmed in the 14 English colonies
of British North America . The Ohio River Valley
General Braddock, a British officer was
appointed to lead an expedition to capture Fort Duquesne British
North America . This expedition was in response to the battle of Fort Necessity New England
colonial governments had successfully besieged Louisbourg in 1745, the colony
of Virginia Virginia Britain Virginia Virginia
The British had no comprehension of how
different the terrain in North America was.
The way of fighting war was extremely different from Europe .
The French had refined their skills of bush fighting to a science. The French
colonial militia and their Amerindian allies would inflict a stinging and
humiliating defeat on the British and American forces. Nearly every single
British officer was killed. Only Captain Orme was the sole surviving British
officer who would later resign from the army as a scapegoat for a disaster.
While it was a French victory, it would be the beginning of the end of New France .
PLAYTEST:
The British forces advanced across the
Monohedleda river. The entire column had advanced across the river to continue
on to Fort Duquenese Quebec
FORCES:
 Quebec Milice and Huron guide leave Quebec(photo courtsey of Kerry Delorey)
Edward Braddock, commander. Le Compaigne Franches:
2
Halket`s 44th Regiment of Foot:
6 The Amerindian Nations
of
Dunbar`s 48th Regiment of Foot:
6 Ottawa:3
The Independent companies of: Miami 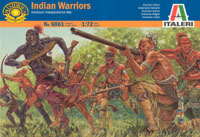
(plasticsoldierreview.com)
Captain Rutherford`s New York Company:
3 Hurons: 2
Captain Gates New York Company: 3 Delawares
Captain Delmare`s South Carolina Company:
3 Shawness: 2
Royal Artillery: 2 light guns, 1 mortar, 2
medium guns Mingoes: 2
The Virginia Light Horse: 2 Chambly
The Virginia
The Virginian Rangers (Stevens, Hogg`s,
Waggoner`s, Cocke`s, Perronee`s): 5
The Maryland
The North
Carolina
Wagons: 5
SPECIAL RULES: To simulate the fact that
the Ameridians and French colonial forces were well hidden, the French player
gets 2 special rules. 1) The French/Ameridians units start the game hidden from
the British player. The British deploy in a column and may not fire until they
have seen a French unit. French units may fire at any British unit while hidden
but must then be placed on the board 10cm from a British Unit in order to
reflect the close quarters of the battle.
2) All French/Amerindian units gain a +2
bonus on their first fire.
VICTORY CONDITIONS: The French win a sudden
death victory if they inflict through fire or routed off the map 20
British/American units. The British win if they inflict through fire or routing
8 French or Amerindian units.
THE MAP: The area the battle was fought in
was close to virgin forest. The map should be completely green save for the
Monongahela river which can be represented as a 5cm wide blue strip of ribbon,
paper or the river sections found on juniorgeneral`s website.
The British are marching in a column and
building the road as they advance. This can be represented by brown paper or
cloth 10 cm wide. The Battle
BUILDING THE ARMIES:
While there are no specific French and
Indian War plastic figures on the market, Italerai, Accurate, and Strelets all
produce 18th century figures which can be altered with a modeling
knife or by painting. There is now a Woodland Indians set that Italerai makes
which would be perfect for the Amerindians, and Accurate`s American Militia for
the War of Independence could be painted up as French and Indian War. Accurate
also make British troops which though their clothing is for 1775 could pass for
1755.
SETUP SEQUENCE: The British/Americans advance
across the river and slowly build the road to take them to their objective, so
the British may deploy first. However, they may not deploy into the woods, but
only on the road. The French/Amerindians can deploy anywhere on the map, and
are only shown when they give their first fire.
FORMATIONS: The British/Americans advance
as a column while the French and Amerindians deploy in a firing line. (Much the
same as all other 18th century scenarios as seen on JG.)
MOVEMENT: To reflect that the
British/Americans are cutting the road as they advance, they may only move 10
cm regardless of being in line or column formations. The French/Amerindians may
move 15cm without any movement penalty.
FIRE: Units that are in line formation and
artillery that didn`t move this turn may fire. Range is measured from the center
of a unit to the nearest part of the target unit. Units may fire to the front
and not through the narrow gaps of friendly units, or over the heads of friendly
units. Roll one dice per infantry base or two for each artillery base.
The chart indicates the number needed for a
hit. Remove one base for each roll hit rolled by the firing unit. It takes 3
hits in one turn to remove an artillery base. You may only use the 5 cm firing
column when firing on a charging unit, if you are British/American. The
French/Amerindians may advance and fire up to 5 cm at any time. If the unit is
reduced to single surviving base, then the last base is immediately removed.
SHOOTING: 5cm 15cm 30cm
Muskets: 5-6 6 -
Light Cannon: 4-6 6 6
Medium Cannon: 4-6 5-6 6
CHARGES: Both sides may charge during the
charge phase. A unit may not declare a charge unless it is in line formation
and within 5 cm of an enemy unit. If it matters the French charge first. A
player may measure to see if a unit is withing charging range. One enemy unit
must be chosen as the target of the charge. A unit that wishes to charge must
first pass a morale check. If it passes, they can charge. If they fail, they
can`t charge this turn. The target unit must also do a morale check. If the
target unit fails morale, it retreats 15cm. If it passes, then proceed to
melee.
MORALE CHECK: If a unit has to take a
morale check, Roll one die and add any modifiers. If the roll is less than or
equal to the number of bases (plus a commander if one is present), then it has
passed. If the role is greater, then it fails. Artillery must roll a 4 or less
to pass a morale check.
MORALE DIE MODIFIERS:
Commander present: -1
Grenadiers: -1
Amerindians: +1
MELEE: If a charging unit makes contact
with a target unit, there will be a melee. Each side rolls a die and applies
the modifiers. High roll wins. The looser removes a stand and retreats 15cm
while the winner takes the place of the losers spot. The unit must then spend
the next turn reforming. If the roll is a tie, both sides remove one base and
rolls again.
MELEE DIE MODIFIERS:
More stands than opponent: +1
Hitting the rear or flank: +1
Commander leading charge: +1
Amerindian first charge: +1
Grenadiers: +1
Artillery crew: -1
Militia: -1
COMMANDERS: A Commander may join or leave
one of his units during movement. This unit gets a +1 bonus on all melee rolls
and the officer counts as a base when testing morale. Every time a unit with an
attached officer is completely eliminated by enemy fire, (the last base
removed) or is engaged in melee (win or loose) roll one die. If the role is a
6, the Commander is a casualty and is removed from play. This is the only way a
commander can be eliminated.
Refought 12/11/11
General Braddock led his army across the Monongahela river on the way to Fort Duquense. As his collum advanced, the Grenadiers came across a meadow where Les Compaigne France fired a tremendous volley into their ranks. The Amerindians were rather skittish to move out of the tree line to engage the British. Suprisingly it was the British regulars who broke and ran rather than the colonials. The Grenadiers eventually fell back to the main group only to be cut down by more musketry. The colonials charged the tree line twice to fire a volley, then fall back. Eventually, the British began to fall back. The Amerindians didn’t seem to have much stomach for a fight, while the Milice and Compaigne Frances were able to ensure that the British advance was checked. General Braddock and Col. Washington were able to rally their troops and fall back to the river. This refight ended inconclusively. Round two will follow.
USEFUL RESOURCES:
“The Battle of Monogahela” www.britishbattles.com
America`s First World War: The French and
Indian War 1754-63. Timothy J. Todish 1982.
“Monogahela 1754-55; Washingtons defeat,
Braddock`s Diaster. Rene Chartrand, Osprey Publishing 2004
Wolfe`s Army. Robin May, Osprey Publishing,
1998
Montcalm`s Army Martin Windrow Osprey
Publishing, 1973
Louis XV`s Army 5: Colonial and Navy
Troops, Rene Chartrand, Osprey Publishing, 1998
Colonial American Troops 1610-1774 (3) Rene
Chartrand, Osprey Publishing 2003
Indian Tribes of the New
England Frontier. Michael G. Johnson, Osprey Publishing 2006.
American Woodland
Indians Michael G. Johnson, Osprey Publishing 1990.
No comments:
Post a Comment
Note: only a member of this blog may post a comment.